Connecting to a remote Postgres Docker container
Recently I decided to start hosting a Lemmy instance. I am hosting it on a Docker server on Digital Ocean, following the very easy-to-use Lemmy Easy Deploy instructions.
Naturally, I needed to explore the Postgres database to make minor changes and create backups, so I set forward on discovering how to connect to and access it locally.
These instructions should be the same for any remote host, so you should be able to follow this for any service that provides SSH tunnel access.
What you'll need #
- pgAdmin or similar Postgres GUI interface
- All necessary credentials, which include
- Postgres username and password
- SSH username and password/ssh key.
Instructions #
1. Find out your Docker container's IP. #
SSH into your remote container and run docker ps -- This will provide you information regarding any running docker images, with their unique ids, the image powering them, any ports in use, when the image was created, how long its been running, and their indentifying names.
$ docker ps
CONTAINER ID   IMAGE
0123456789ab   caddy:latest
abcdef019234   ghcr.io/ubergeek77/lemmy-ui:0.18.3
3456789abcde   ghcr.io/ubergeek77/lemmy:0.18.3
def012345678   postgres:15-alpine
789abcdef012   asonix/pictrs:0.4.0
If you've also changed the port, make note of that column (my example above is missing several columns as it is an example). Grab the 'Container ID' for the 'postgres' image and find out the IP by running the following command, where {container_id} is the result from your docker ps call above (for instance def012345678)
$ docker inspect {container_id} | grep IPAddress
  "SecondaryIPAddresses": null,
  "IPAddress": "",
    "IPAddress": "666.13.0.1",
Make a note of this IP address, we'll need it to connect to the Host after tunneling.
2. Create a new connection in the pgAdmin app #
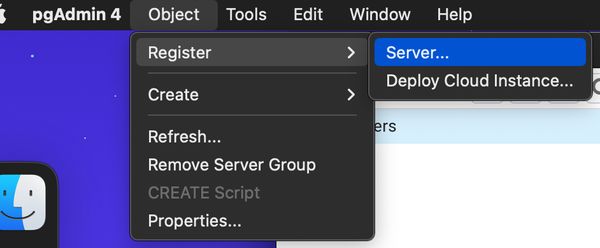
Load up your local copy of pgAdmin and either click 'Object' in the toolbar, or right click 'Servers'
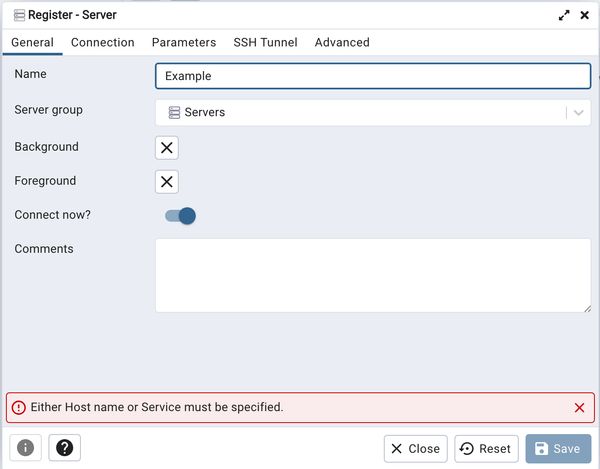
Provide it with a name for easy reference.
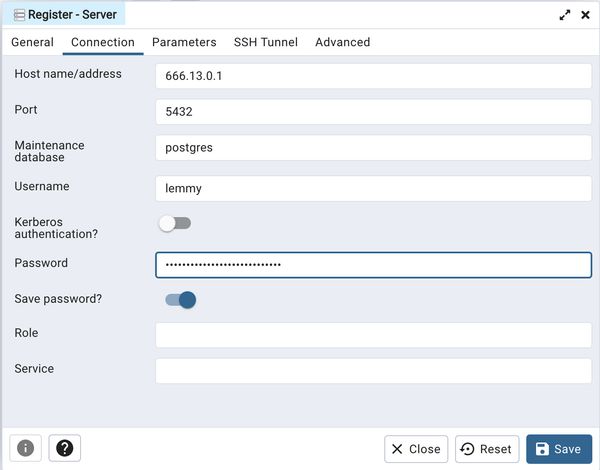
Under the "Connection" tab, provide the IP address discovered above for the Hostname, and replace the port if it is different than what Docker says. Then update the Username and Password fields with correct values.
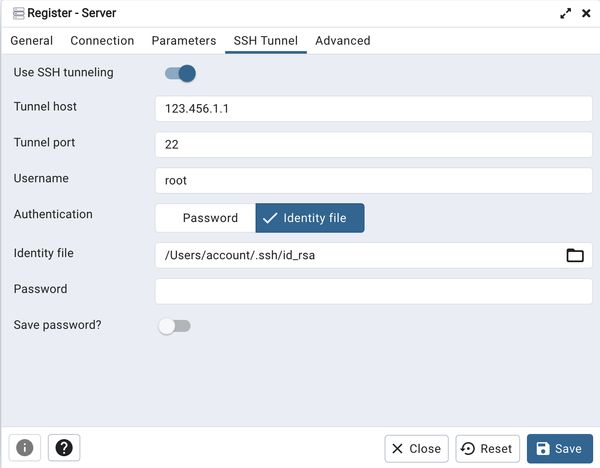
After these changes, head over to the "SSH Tunnel" tab and provide your details there for connecting to your server. In the case of Digital Ocean (the majority of the time), you'll want to select "Indentity File" for the Authentication method and select the file on your system.
After all of this, select "Save" at the bottom and you should successfully connect!
3. Success! #
You should have successfully managed to connect to your database. If you're having an issue and it's something I may be able to help with, send me a message over on Mastodon.
What's next #
The tables are several nested layers down by going to Database > {name} > Schemas > Public > Tables

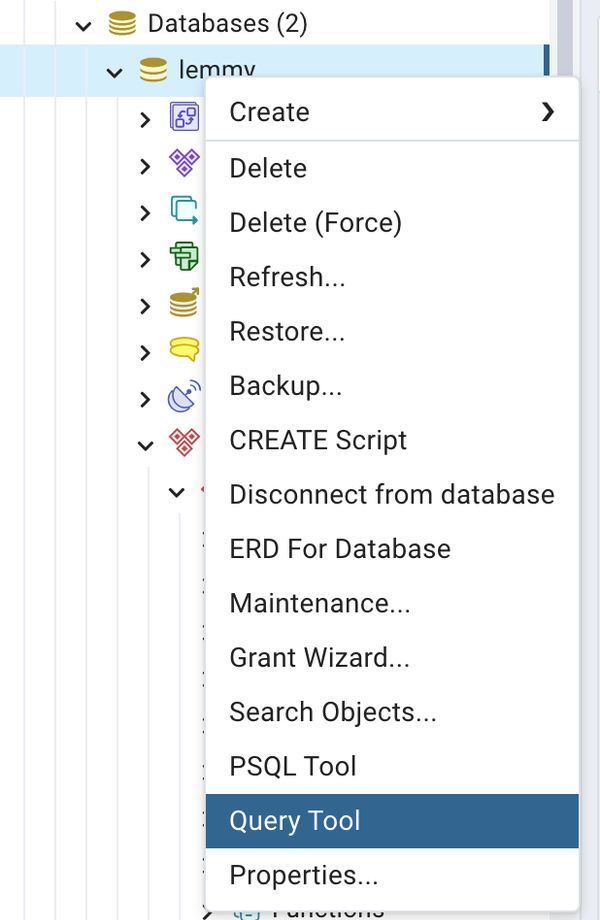
But you can start navigating the content early by right-clicking the database and selecting one of the Tools listed, such as 'Query Tool'
Conclusion #
This process was a little difficult to discover, and for me to navigate (first time working with Postgres this closely), so I hope these steps help you spin up and test faster than it took me :)